
One of my proudest DIY moment was when I re-fixed this old suitcase that I ended up using for my gift cards. Now that my wedding is way over, you can see how it was used at the real event. Click on "read more" for directions on how to reupholster and old vintage suitcase.

Materials:
Glue Adhesive Spray
Hot Glue Gun
Any type of trimmings
1 yard of fabric
Vintage Suitcase or Vintage Makeup Bag
Poster board
Scissors
Ruler
Pencil
Directions:
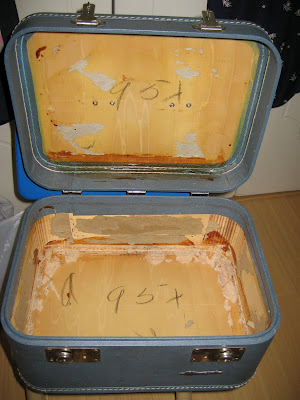
#1. Clean your suitcase (inside and outside) with water. If inside smells really bad, put a laundry sheet in it for a day to get the smell out.
#2. Take out the interior lining and clean again.
Note: If you can't get some of it off, that's ok. Just make sure to get as much as you can out.
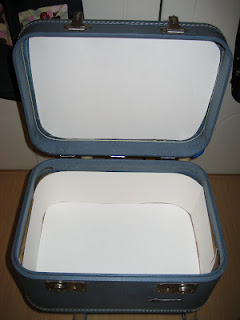
#3. Cut out the poster board to the size of the bottom, sides, and top of the suitcase. Try to make the poster board cut out as close as you can, but not too tight! Make sure to give a little leeway for the fabric to overlay on top of it. I did a lot of estimating on this part.
Note: If you keep the old interior, you can use that as your measurements instead of measuring or estimating the size of the inside.
#4. Once you have all the poster board cut outs ready, cut out the fabric according to size. I left about a 1" border on all the sides. As you can see, its not exact. You won't be seeing the back to if the edging is horrible, don't worry.

#5. Spray one side of the poster board and quickly place the fabric on top of it. Make sure to place the poster board in the middle of the fabric. Also, make sure the fabric is as flast as can be so you don't have any bumps showing on your suitcase.

#6. Hot glue gun the edgings onto the backside of the poster board.
Note: When you get to the edges, it doesn't have to be perfect. All you need to worry about is to make sure the front is flat. If you have a lot of fabric on the edges, cut some at an angle (picture shown below).


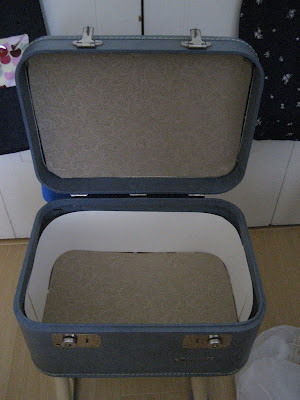
#7. Check if the poster board with the fabric fits into the suitcase nicely. Not too tight nor not too loose.
Note: If you have gaps that are wider than 1/4", you may need to redo it as it will show later on. On the other hand, if you have a large trim that can cover it up, then you should be fine.
#8. Once all the poster boards with the fabric are placed into the suitcase do not glue it down to the suitcase yet! The only thing you are to glue down are the poster boards that are for the sides of the suitcase. If you do not glue it on, it will continually keep popping out while placing your trimming on.

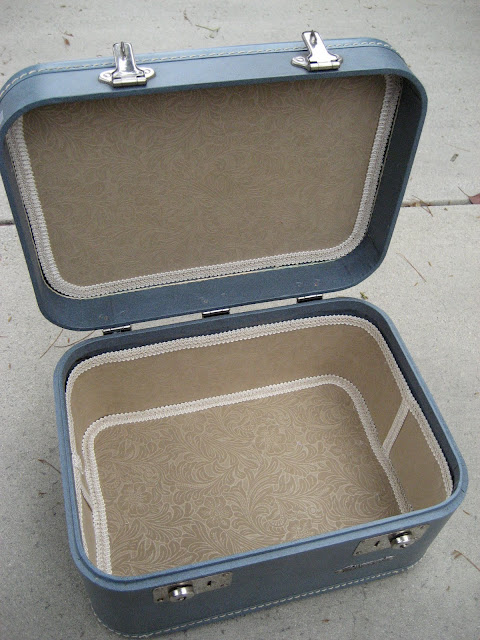
#9. Add as much trim as you want. Trimming helps a lot to cover up those icky gaps and spots that aren't very pretty.
Note: I added trim to the mid section of the sides because that's where the two poster boards met. I didn't want to have a line showing so I added the trim to hide it.

Optional: If you want to glue down the poster boards with fabric onto the suitcase, it is doable. I didn't glue down the bottom or top incase I wanted to go back and change the interior. The only parts I did glue down was the sides. If I didn't glue it down, it would be popping out. It's all up to you and how snug your poster board fabrics are to the suitcase.

Finished!
No comments
Post a Comment